Quick Start Guide
Welcome to the Server! These guides are meant to guide you through the basics of each faction in Halo: Space Station Evolved, from getting your equipment to getting into fights.
 United Nations Space Command (UNSC) Tutorial
The UNSC are the military arm of the Unified Earth Government, fighting both a fight for survival against the Covenant and an insurrection led by the United Rebel Front.
| Beginners are advised to start with the "Marine" role due to their lack of responsabilities.
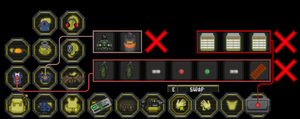
Note: This guide uses the assault phase of the Reclamation gamemode as an example. Some things may vary in actual gameplay, but the general idea is the same. BriefingRise and shine, marine. A ship of the Covenant has been detected on long-range scanners and HIGHCOMM believes it to be an invasion force headed for the colony you were stationed to, so you've been thawed out of cryostasis to defend the Orbital Defense Platform "Cassius", the world under its guard and the colonists on it while a support fleet gets here. Before you can do that however, you need to gear up. Getting Your StuffOnboard some vessels you may need to follow From the
Now, from the
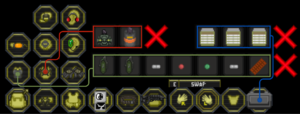
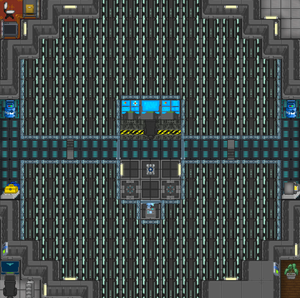
After you've picked a weapon, remember to vend yourself some ammo for it. You can also store Once you're geared you must also ensure that you're well fed, as it will allow you to move without a hunger slowdown and help your blood regeneration, both useful for avoiding plasma bolts and not dying from them. The mess hall is located directly starboard (i.e. north) of your bunks and has a few voice-operated machines called What To DoNow, to prepare the Cassius for defense, you will have to find the locations of the
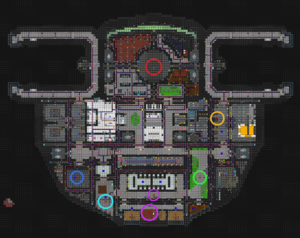
*Marked on the ODP map above. Once you find them, use your headset (with the ":q" prefix to speak in the UNSC radio channel) to tell your allies of their locations so they too know where the enemy could head to. Next to Cargo is a room full of engineering supplies where you can find things to build defenses with, and the equipment vendors also hold coils of
Keep in mind that if they are deployed, however, they must be guarded to prevent the enemy from packing and hiding them, destroying them, or even using them against you and your brothers in arms. Aside from trying to seize the weakpoints, the Covenant may also try to destroy the MAC as it is the only thing keeping them from destroying the station with ship-to-ship weapons. To do that, they must destroy the Now that you're geared and know where to defend, all that's left to do is hold out until the support fleet arrives. They expect to be here by operation time 01:10, but if the ODP goes down they'll take longer. Until first contact happens however, you can shoot the breeze with your fellow marines, check out your new toys at the firing range, or read one of our other guides to learn about the server's combat mechanics, vehicles or what to do if Cassius falls. Good Luck, Have Fun! |
 Covenant Tutorial
The Covenant are a hegemony of alien species rallied under the holy decree of the High Prophets: the anihilation of the human race.
| Beginners are advised to start with the "Unggoy Minor" role due to their lack of responsabilities and simplicity relative to other minor roles.
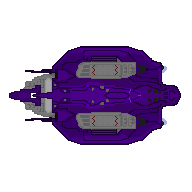
To play as one, you must change your species to "Unggoy" in Character Setup. Note: This guide uses the point of view of an Unggoy Minor during the assault phase of the Reclamation gamemode. Some things may vary in actual gameplay, but the general idea is the same BriefingRise, warrior of the Covenant. Your vessel, the CRS-class crusier Unyielding Transgression, is closing in on a heretic world for an artifact retrieval operation. Before that however, you must destroy the heretic Orbital Defense Platform guarding it. Each moment counts, as the heretics were expecting you and have summoned a support fleet expected to arrive by mission time 01:10, but destroying that station will delay them. Preparing YourselfFirst thing to do, however, is to ensure you're well fed. Being hungry slows down your speed and blood regeneration, both crucial for your survival. Within your quarters you will find From the
Now, from the
Aside from those, the Unggoy also get the following heavy weapons:
As these are the bare essentials, you'll be left with some room for variation in your kit. For example, you could add an explosives hardcase full of plasma grenades, or even run two plasma pistols at once so you can keep firing for longer. Preparing Your ShipOnce you're geared, you will have to confirm that the ship's
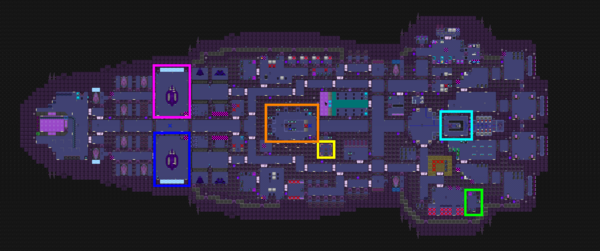
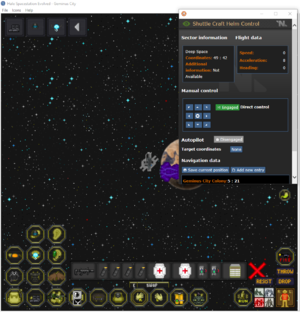
You will also need to move the ship closer to the ODP, but that wont be possible until 10 minutes have passed since mission start. Here's a quick guide on how to get the ship there, should you be assigned the task when the time comes. Planning Your AssaultAfter checking on the shields, you and your allies will have to decide how to bring that ODP down so you can begin your scan. For such demolition operations, the CRS has been issued an Assault Methods
|
ODPs always have 3 weakpoints, 2 assigned at random and 1 in the Magnetic Accelerator Cannon (MAC) Control Room. The 2 random points can be located in:
You may also notice tiny blue circles near some of the possible weakpoint spawns, they are locations that Boarding Pods can target and land at. |
Optional Objective: Disable the Magnetic Accelerator Cannon
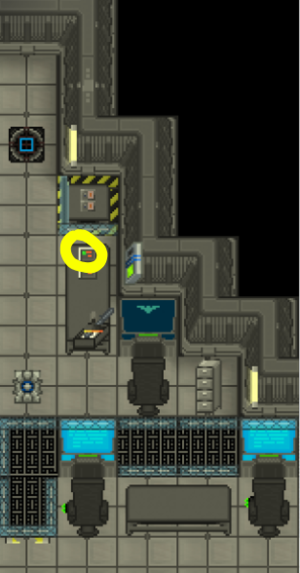
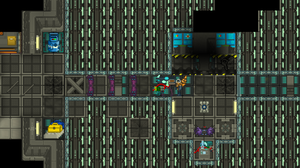
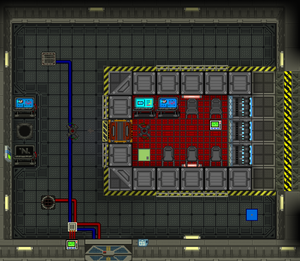
The MAC is the only means of self-defense that the ODP has and disabling it will let your team safely attack it with the Unyielding's deck guns, or maybe with something stronger from the ![]() Long Range Requisitions Console in the bridge. While this isn't strictly necessary, this will grant your team another method of bringing the ODP down in case the first assault wave fails, and the control room also has a structural weakpoint where you can plant the bomb. The doors leading into the control room may be blocked by
Long Range Requisitions Console in the bridge. While this isn't strictly necessary, this will grant your team another method of bringing the ODP down in case the first assault wave fails, and the control room also has a structural weakpoint where you can plant the bomb. The doors leading into the control room may be blocked by ![]() blast doors, which can be raised from the ODP's Command Deck (the room directly southwest of the control room itself).
blast doors, which can be raised from the ODP's Command Deck (the room directly southwest of the control room itself).
What You'll Need
What To Do
|
Defense of the Control Room
If you wish to plant the bomb here, know that the control room's small space works both for and against you; if you bring a ![]() plasma turret emplacement (available from weapon vendors as the "Type-52") you will be able to lock down one side of it through sheer volume of fire and keep the heretics from advancing. Turret emplacements can deflect bullets as long as you're facing in their direction, but the heretics could start throwing grenades or rockets which you may not be able to dodge. Building defenses is an option, at the expense of reducing the space available for movement and making it harder to escape when the time comes.
plasma turret emplacement (available from weapon vendors as the "Type-52") you will be able to lock down one side of it through sheer volume of fire and keep the heretics from advancing. Turret emplacements can deflect bullets as long as you're facing in their direction, but the heretics could start throwing grenades or rockets which you may not be able to dodge. Building defenses is an option, at the expense of reducing the space available for movement and making it harder to escape when the time comes.
Construction materials are available in the room north of the Unyielding's shield generator and in both hangars, and a ![]() Construction Materials hardcase will make lugging them around easier.
Construction Materials hardcase will make lugging them around easier. ![]() Full-height barricades in particular stop
Full-height barricades in particular stop ![]() heretic grenades while also letting you shoot past them, and standard
heretic grenades while also letting you shoot past them, and standard ![]() nanolaminate barricades have a chance to stop rockets.
nanolaminate barricades have a chance to stop rockets.
To exit turret emplacements you must drop the gun. To reload them, drop the gun then get back on. If you see a black screen while scoped in, adjust the zoom with the buttons in the top left of your screen.
Getting Out
Assuming you manage to find a weakpoint, plant the bomb and hold against the heretic onslaught, you will need an escape method. If you can't have a phantom fly you home, your remaining options are:
 Find an escape pod and launch it to the planet, but you'll have to wait until someone can pick you up.
 Make your way to an umbillical and connect to the colony. You'll still be stranded, but you'll know where you'll end up. All umbillicals are located on the northern ends of the station however, so in most cases you'll need to move quickly.
 Steal a dropship to escape AND deny the enemy an asset. Be prepared to adapt however, as by the time you reach the hangar you could be met by an empty bay or a group of evacuating marines.
Whichever option you choose, you will have 2 minutes (plus however many seconds were left on the bomb as you left) to leave as the platform's superstructure collapses. If you're still on the ODP as it deorbits, you'll be subject to a hefty yet surviveable amount of harm. Should you manage to stabilize yourself, you may radio for evac or use an escape pod to land on the colony. Note that using damaged escape pods will cause further harm, and that you will have to repair them to be able to use them safely.
Once you are geared, in position and have your assault and escape plans, all that's left to do is take your leave towards the ODP. Stick with your squad, watch your firing lanes and don't forget the bomb. If you complete your mission and return to the Unyielding, or die while escaping but want to respawn and keep fighting for the Covenant, it is suggested you read up on the next part of your mission.
Good Luck, Have Fun!
 The URF
The URF consists of several different groups united by their hatred of the Unified Earth Government, ranging from disgruntled colonists fighting for less oppressive taxation to political extremists looking for revenge.
Limited to select gamemodes.
| Beginners are advised to start with the "Insurrectionist" role due to their lack of responsabilities.
Note: This guide uses the assault phase of the Revolution gamemode on the map KS7 as an example. Some things may vary in actual gameplay, but the general idea is the same BriefingAttention, fighters of the GSN Retribution. We've come across a local colony with an Orbital Defense Platform and we are to destroy it to prove to the people the UNSC's inability to defend them before going down to instigate a revolt. Unfortunately, we had a mole and now they've got a fleet coming to blow the Retribution to bits in about an hour, but if we take that ODP down we'll get more time. Gearing UpDepending on where you're at when the time comes, you may have to follow From the
Now, from the
After you've picked a weapon, remember to vend yourself some ammo for it. You can also store Once you're geared you must also ensure that you're well fed as it will allow you to move without a hunger slowdown and help your blood regeneration, both useful for avoiding bullets and not dying from them. The cafeteria is the room west of the armory and has a few vending machines that can get you a quick bite to eat and a voice-operated Making FriendsNo single URF cell can stand alone, which is why you have access to a
Planning Your AssaultAfter gearing up and maybe doing a few missions, you and your allies will have to decide how to make your move. To bring the ODP down, you must use the Retribution's Assault Methods
|
ODPs always have 3 weakpoints, 2 assigned at random and 1 in the Magnetic Accelerator Cannon (MAC) Control Room. The 2 random points can be located in:
You may also notice tiny blue circles near some of the possible weakpoint spawns, they are locations that Boarding Pods can target and land at. |
Getting Into Position
Once you've laid out a plan, you will have to get closer to the ODP. You could move the Retribution towards it, but you risk entering the 7-overmap tile range of its Magnetic Accelerator Cannon and getting your base of operatons blown to hell. Alternatively, you could make use of the bridge's ![]() Long Range Requisitions Console, located in the center fof the room, to order a smaller ship to get you there.
Long Range Requisitions Console, located in the center fof the room, to order a smaller ship to get you there.
! Transports are the suggested ship type at this stage. While other ship types have their own upsides, you won't be able to make proper use of them while the ODP's MAC stands.
- Podcarriers come with boarding pods, if you plan on using those.
- Troop Transports have two hangar bays that will let you bring a pelican along, but you'll have to fly it to the troop transport's hangar first.
Regardless of your choice, keep in mind that you wont be able to move ships until 10 minutes have passed since mission start. Here's a quick guide on how to get the ship there, should you the task fall to you when the time comes.
Optional Objective: Disable the Magnetic Accelerator Cannon
The MAC is the only means of self-defense that the ODP has and disabling it will let your team safely attack it with the Retribution's own Magnetic Accelerator Cannon to bring it down. While this isn't strictly necessary, this will grant your team another method of bringing the ODP down in case the first assault wave fails, and the control room also has a structural weakpoint where you can plant the bomb. The doors leading into the control room may be blocked by ![]() blast doors, which can be raised from the ODP's Command Deck (the room directly southwest of the control room itself).
blast doors, which can be raised from the ODP's Command Deck (the room directly southwest of the control room itself).
What You'll Need
What To Do
|
Defense of the Control Room
If you want to defend this place, know that the control room's small space works both for and against you. Due to the only way inside being tight corridors, turret emplacements are a good option for defense.
Chainguns, will be able to lock down one side through sheer volume of fire and keep the enemy from advancing. Available from the armory's plastic racks.
Heavy Machine Guns, while having a slower rate of fire, will hit them harder. Available from the plastic racks and
heavy weapon vendors.
To exit turret emplacements you must drop the gun. If you see a black screen while scoped in, adjust the zoom with the buttons in the top left of your screen.
Turret emplacements can deflect bullets as long as you're facing in their direction, but the marines could start throwing grenades or rockets which you may not be able to dodge. Building defenses is an option, at the expense of reducing the space available for movement and making it harder to escape when the time comes.
Construction materials are available in the Engineering section of the Retribution, all the way to the back (i.e. east) of the ship, and a ![]() Construction Materials hardcase will make lugging them around easier.
Construction Materials hardcase will make lugging them around easier. ![]() Full-height barricades in particular stop
Full-height barricades in particular stop ![]() grenades while also letting you shoot past them, and standard
grenades while also letting you shoot past them, and standard ![]() plasteel barricades have a chance to stop rockets.
plasteel barricades have a chance to stop rockets.
If you plan to build defenses before you plant the nuke, you may also have enough time to plant mines to stall the enemy advance. Heavy Equipment Vendors offer 4 types of mines, all having a 4x4 activation range and requiring 3 seconds to plant and another 5 seconds to arm. They'll hide once armed and can be triggered by anyone regardless of faction, so tell your teammates where you're placing them.
There's also the more powerful types, which require an oxygen supply and airtight protection to shield you from their effects:
Incendiary mines will create a ball of fire around it and raise the room temperature to the point of burning through marine and ODST armor, even if the room's vented.
Gas mines lack an inmediate effect, but anyone without internals exposed to their gas will suffer damage to their liver over time. Tell your teammates if you're planning to use these.
Getting Out
Assuming you manage to find a weakpoint, plant the bomb and hold against the heretic onslaught, you will need an escape method. If you can't have a phantom fly you home, your remaining options are:
 Find an escape pod bay and launch it to the planet.
 Make your way to an umbillical and connect to the colony. All umbillicals are located on the northern ends of the station however, so in most cases you'll need to move quickly.
 Steal a dropship to escape AND deny the enemy an asset. Be prepared to adapt however, as by the time you reach the hangar you could be met by an empty bay or a group of evacuating marines.
Whichever option you choose, you will have 2 minutes (plus however many seconds were left on the bomb as you left) to leave as the platform's superstructure collapses. If you're still on the ODP as it deorbits, you'll be subject to a hefty (yet surviveable) amount of harm. Should you manage to stabilize yourself, you may radio for evac or use an escape pod to land on the colony. Note that using damaged escape pods will cause further harm, and that you will have to repair them to be able to use them safely.
Once you are geared, in position and have your assault and escape plans, all that's left to do is take your leave towards the ODP. Stick with your squad, watch your firing lanes and don't forget the bomb. Once the ODP goes down, you'll be able to start capturing ![]() Sovereignty Consoles around the city to spread your influence and convince the citizens of the colony to join your cause.
Sovereignty Consoles around the city to spread your influence and convince the citizens of the colony to join your cause.
Good Luck, Have Fun!
Useful Links
Rules
https://projectunsc.org/forum/showthread.php?tid=181
Forum
Read about the server's lore and and apply for a faction whitelist that can grant you access to extra roles!
https://projectunsc.org/forum/index.php
Discord
If you can't get a question answered here, feel free to ask in our Discord!
https://discord.com/invite/f8jpDfSdfr
