Guide to Research and Development
Jump to navigation
Jump to search
Learning how to Research
Basics
Being part of ONIs research efforts, you are expected to have a at least decent understanding of the systems ONI uses to create new technology to kill our enemies. This guide will provide info on Research Databases, Techprints, and more.
Research Computer
Somewhere in the Research Department, there will be a purple computer for you to access. This will be what you will spend most of your time using. To get started, it's quite simple.
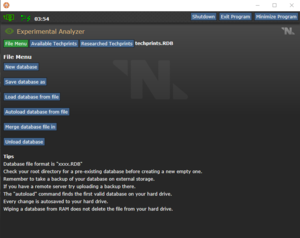
- You will want to hit the 'Autoload database from file' button to load 'techprints.RDB', this will allow you to begin researching. You also can create an new database with it's respective button.
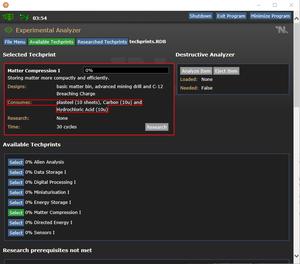
- Move to the 'Available Techprints' tab, this will allow you to see all of the available to research techprints, and techprints you can research in the future.
- Click 'Locate Destructive Analyzer' in the top right so you can begin inputting resources to your techprint research.
- Choose a techprint to research in the available section, a good starter is 'Matter Compression I' as this will allow you to start the tech tree for armor upgrades.
- When selected, it Will show you the designs the techprint unlocks, the requirements to start researching it, and how long it takes to research it.
- Now that you know what it costs to make the techprint, keep it in mind and begin gathering the resources for the upgrade. There are chemistry station(s) and resource shelves available to ONI for this exact purpose. (Note : Silicate cannot be in a beaker with another chemical or it will not work)
- Once you have the materials and chemicals, place the beaker or materials inside of the Destructive Analyzer. You can only put one thing in at a time.
- With the item inside the destructive analyzer, go back to the console and click 'Analyze Item' at the top right. This will destroy the chemical or item, and eject a beaker or storage objective the chemical was in. Now your techprint should have the required item gone from the menu, showing it was added, the percentage bar at the top will also go up.
- Once everything has been analyzed, you can hit 'Research' and it will begin to process the techprint. While it is researching, you can begin to add resources to other techprints, make sure to do this so you can maximize research time.
- Congratulations, once the techprint is fully researched, you can make the designs in the protolathe using the required materials.

